


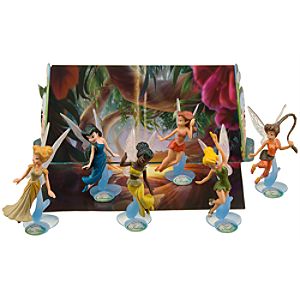
My god-daughter was turning 3 years old. She has been one of the few people who taste-tested my first fondant cake and she loved it. So, for her birthday party, I made this birthday cake for her. I had a month to prepare and plan for it. Her parents (my friends) were very supportive and really believed in me that I was both excited and anxious about it. They give me this Disney Fairies figurine set
Every time I would go to a store or surf online, I was on the lookout for something I might be able to use on the cake. I decided I would go with pink, green and purple colors on the cake. When I saw wired butterflies and ribbons in those colors for sale, I just got them with no clear idea on how I'm going to use them later. I also bought a pair of 10" round pans
Here's how I put everything together.
TOOLS I USED
- 2 - 6 in pans
- 2 - 10 in pans
- Leaf Cut-outs
- Star Cut-outs
- Flower Cut-outs
- Round Cut-outs
Decorating Brush
- Wooden Dowel Rods
- 14" Cake Circle
- Wilton Graceful Vines imprint mat
- FMM Straight Frill Cutter Set 1
- 20" x 30" x 3/16" Foam Board
- X-acto Knife
- Aluminum Foil
- Scissors
- Adhesive Spray
- 3/4" Purple ribbon
- Favorite Cake Recipe
- Marshmallow Fondant
- White Rolled Fondant Icing
- Violet Icing Color
- Leaf Green Icing Color
- Pink Icing Color
- Purple Pearl Dust
- Pink Pearl Dust
- 1 week in advance: Cake Board. Made a 14" Homemade Cake Board. Here's a video I watched to learn how to do it.
 |
| Lightly coat foil-wrapped board with piping gel to help the fondant stick to the foil. |
- 2 days in advance. Made Pink and Purple Marshmallow Fondant.
- Night before the party. Baked and cooled 2-layer 6 in. cake and 2-layer 10 in. cake. Filled and crumb-coated them.
Stacking. Placed the bottom tier on the cake board about 1-1/2 in from the edge of the back side. Stacked purple 6 in cake tier over the 10 in cake tier. Instead of stacking the top tier right on the center of the bottom tier, I placed it about 1-1/2 in from the back of the cake. This gave me enough room for placing the toy figurines. Here's a video I watched to learn about stacking cakes.

Tinker Bell's leaf floor. Rolled out remaining Green fondant (used to cover cake board) and used the largest leaf cut-out
Green Grass Border. Rolled out the remaining Green fondant (darker tint) and used #2 of FMM Straight Frill Cutter Set 1

Celebrant's Name. I didn't have alphabet cutters. So, for the celebrant's name, I used this alphabet stencils
Small Stars. Since I still had the White Rolled Fondant rolled out, I used the smallest star cut-out

Bottom Ball Border. For the purple and green border, I rolled out the Purple MMF, and what's left of my Green (now darker) fondant into same-size logs about 1/2 in. diameter. I, then, used a knife to slice each log into 1/2 in. wide pieces. I rolled each piece into a ball then put them on the cake. I put a green ball after every 4 purple balls.
Finishing Touches. Using a decorating brush, I brushed Purple Pearl Dust on all the purple decorations. And brushed Pink Pearl Dust on all pink decorations. Then placed the wired butterflies I bought from Michael's as well as the toy figurines.
You may be interested in reading the Fondant for Beginners series:


this is fab, i'm just starting up a business from home too, i have 2 babies and it was important for me to be at home with them, i love baking so i've started taking classes. I have a page on facebook www.facebook.com/englishrosecakes i'm just settign up a proper website :0)
ReplyDeletei'll check out your facebook page. happy caking! thanks for your comment.
ReplyDeleteLooks great, ♡ the zebra cake too!! You are very talented, girl! Keep it up!
ReplyDelete