


Before you start covering cakes with fondant, you gotta make sure that you've got the filling and layering and icing down. Otherwise, any imperfections of the cake will show. So, I decided to add this to the series on Fondant for Beginners.
You need a solid cake and a crumb-free environment. Last May, I attended Wilton Course 1 at a Michael's near us. Here are a few tips I've learned:
Monday, June 28, 2010
Thursday, June 24, 2010
Banana Crumb Muffin
There's this one, lone banana on our counter top staring me down for days now. It is getting brown and ugly but I didn't want to throw it away. I thought about baking a banana bread but ONE banana would not be enough. Then it struck me...Muffins! I can make banana muffins!
I thought about it some more. I didn't want ordinary looking banana muffins that's actually just banana bread in a cuter package so I went to my ever dependable best friend - Google. And found this one from Allrecipes.com which had over 5,000 reviews and had 5 stars.

Here's my modified version and some tips to remember. Please don't get confused with my photos. I only had one banana so I had to adjust the recipe accordingly.
Ingredients:

Preheat oven to 375 degrees F (190 degrees C). Lightly grease 10 muffin cups, or line with muffin papers .
.

OPTIONAL (if adding nuts): Place nuts on a baking sheet and bake for about 8 to 10 minutes or until lightly toasted. Let cool and then chop coursely.

In a large bowl, mix together 1-1/2 cups flours, baking soda, baking powder and salt. In another bowl, mix together the mashed bananas, white sugar, egg and melted butter.

Beat the mashed bananas mixture. Stir the banana mixture into the flour mixture just until moistened.
OPTIONAL: Fold in the chopped nuts. Leave a few nuts to be used as topping - about 2-3 tablespoons.


In a small bowl, mix together brown sugar, 2 tablespoons flour and cinnamon. Cut in 1 tablespoon butter until mixture resembles coarse cornmeal.

Spoon the batter into the muffin cups (I use an ice cream scoop to do this. And also put water on the unused muffin cups/spaces for even baking). Sprinkle the brown sugar topping over muffins.
OPTIONAL: Top with the remaining nuts.


Bake in preheated oven for 18-20 minutes, until a toothpick inserted into center of muffin comes out clean.
Banana Crumb Muffin
I thought about it some more. I didn't want ordinary looking banana muffins that's actually just banana bread in a cuter package so I went to my ever dependable best friend - Google. And found this one from Allrecipes.com which had over 5,000 reviews and had 5 stars.

Here's my modified version and some tips to remember. Please don't get confused with my photos. I only had one banana so I had to adjust the recipe accordingly.
BANANA CRUMB MUFFIN
Servings: 10-12
Ingredients:

- 1-1/2 cups all-purpose flour
- 1 teaspoon baking soda
- 1 teaspoon baking powder
- 1/2 teaspoon salt
- 3 ripe bananas, mashed (brown with age is the best)
- 3/4 cup white sugar
- 1 egg, lightly beaten
- 1/3 cup butter, melted (and cooled)
- 1 cup shelled walnuts or pecans (optional)
- 1/3 cup packed brown sugar
- 2 tablespoons all-purpose flour
- 1/8 teaspoon ground cinnamon
- 1 tablespoon butter
Preheat oven to 375 degrees F (190 degrees C). Lightly grease 10 muffin cups, or line with muffin papers

OPTIONAL (if adding nuts): Place nuts on a baking sheet and bake for about 8 to 10 minutes or until lightly toasted. Let cool and then chop coursely.

In a large bowl, mix together 1-1/2 cups flours, baking soda, baking powder and salt. In another bowl, mix together the mashed bananas, white sugar, egg and melted butter.

Beat the mashed bananas mixture. Stir the banana mixture into the flour mixture just until moistened.
OPTIONAL: Fold in the chopped nuts. Leave a few nuts to be used as topping - about 2-3 tablespoons.


In a small bowl, mix together brown sugar, 2 tablespoons flour and cinnamon. Cut in 1 tablespoon butter until mixture resembles coarse cornmeal.

Spoon the batter into the muffin cups (I use an ice cream scoop to do this. And also put water on the unused muffin cups/spaces for even baking). Sprinkle the brown sugar topping over muffins.
OPTIONAL: Top with the remaining nuts.


Bake in preheated oven for 18-20 minutes, until a toothpick inserted into center of muffin comes out clean.
Banana Crumb Muffin
Tuesday, June 22, 2010
Fondant for Beginners: Marshmallow Fondant (MMF)
 Marshmallow fondant (MMF for short) is the home-made version of the rolled fondant you see adorning those incredible looking cakes on Ace of Cakes, Cake Boss or The Ultimate Cake-off. I recommend that marshmallow fondant NOT be your first experience using fondant. Your first time making and using it may not come out right and easily discourage you from ever doing it again. With traditional fondant, you knead it prior to use to make it soft and pliable. I started with MMF right away, it felt like I was kneading forever. I'm just glad that my husband was there to the rescue. When I tried Wilton Rolled Fondant
I started out with MMF because it's inexpensive. It's just a mix of mini marshmallows, powdered sugar and water - pretty simple right? You can knead it by hand but if you have a stand mixer (kitchenaid or similar) then you're all set for a hands-free fondant experience. Here's the recipe and videos on how to make it using a mixer or kneading by hand.
TOOLS
- Large Microwable Bowl
- Wooden Spoon or Spatula
- Stand Mixer with Dough hook attacment (optional)
- Microwave Oven
- 16 oz. bag of mini marshmallows
- 2 lb bag of powdered sugar
- 4 tablespoons of water
- Crisco
(all-vegetable shortening)
- Gel food colors or Cocoa powder (optional)
- Flavoring (optional)
- Plastic Food Wrap
Melted marshmallows are sticky and is a nightmare to clean up. Don't forget this step to make it easier for yourself later.


Step 2 - Melt the marshmallows in the microwave.
Put the marshmallows in a heatproof bowl and add the water. Put the bowl in the microwave oven and heat it for approx. 2 mins. until the marshmallows puff up like on the photo.

Step 3 - Stir and add optionl ingredients.
Stir the marshmallows until they get smooth. This is the time where you can add your chosen food color/cocoa powder for the entire batch rather than trying to knead it in later. You can also add few drops of the flavor you desire. I added 1 tablespoon of cocoa powder in this batch.

Step 4 - Add powdered sugar.
If you are using a mixer, go ahead and put about 3/4 of the powdered sugar on the mixer bowl and add all of the melted marshmallows over it.

If not, just add the powdered sugar 1 cup at a time onto the bowl of melted marshmallows and stir with a well-greased wooden spoon.
Keep mixing on low-speed (or stirring with the wooden spoon) and adding the remaining sugar until the fondant is firm, neither dry or sticky.
Step 5 - Turn out into greased surface and knead
Turn out on to a clean, firm work surface and knead by hand just for a minute until there are no flecks of dry powdered sugar remaining. Rub a little bit of Crisco on it and wrap in plastic food wrap and seal it in an airtight bag (Ziploc).

Let it sit for at least an hour before using but I prefer to let it rest a day before I use it.
WATCH AND LEARN
Here are the videos I watched to learn how to do it. I really like seeing it being done before I do it myself.
Stay tuned for the remaining posts in this series:
Monday, June 21, 2010
Fondant for Beginners: Tools

I'll write a series of posts of the tools, ingredients and how-to's of how I started instead of writing all of them in one post. I don't want to overwhelm you with information. I just want to help you get started and kinda get a feel of whether or not this is something that you want to venture on.
Here's a few more things I learned from my mistakes when I made my first cake:
- Fondant loops or bows should be done in advance for it to dry and hold it shape.
- DO NOT use facial tissue to hold the shape of the bows because the paper will stick to the fondant. Use paper towel or wax paper instead instead.
- DO NOT refrigerate the cake once it is covered with fondant. The condensation in the refrigerator will make the cake sticky.
TOOLS
- 2 - 9" round cake pans from my bakeware set
to bake the cake
Big and Small Rolling Pins - this is used to roll out the fondant. I used a regular rolling pin. Later on, I bought the Wilton Fondant 20" Rolling Pin
(about $20)and the Guide Rings
($4-5) that helped roll out fondant to the right thickness. I also had a small rolling pin I used to roll out small pieces of fondant for the decoration. I'm not even sure where I got it. It's almost like a toy. You can stick with the big rolling pin but for convenience I recommend the Wilton Fondant 9" Rolling Pin
.

- Rolling Mat
- a nonstick surface for rolling out fondant. It's also pre-marked with circles and one-inch square grid which is a big help for measuring, rolling and cutting fondant. It's about $10.

- Round Cut-outs
- helped me cut the circle shapes. The set is $3 from Michael's.
- Star Cut-outs
- cookie cutter for the star shapes.

- Easy Glide Fondant Smoother
- essential tool. You use it to smooth the fondant onto the cake when you cover it.
- Ruler
- helped me make the ribbons and loops. Later on, I bought the Wilton Ribbon Cutter and Embosser
set for around $15 at Michael's.

- Cutter/Embosser
- this is what I used to make that zig-zag mark on the fondant bow and ribbon.
I used home-made marshmallow fondant to cover the cake and make the decorations.
Stay tuned for the remaining posts in this series:
- How to make home-made Marshmallow Fondant
- Preparing your cake to be covered
- How to cover cake with Fondant
- How to make a Fondant Bow
Wednesday, June 16, 2010
Beatty's Chocolate Cake
So you got the tools and the basic ingredients - it's time to bake your first cake! Everybody loves Chocolate Cake so I decided that it'll be my first ever cake from scratch. I wanted to try my hand in baking first before I start learning how to decorate. A beautiful cake is a waste if it doesn't taste great. After all, you want to have your cake and eat it too, right?
To make the story of my long search short, I found this recipe on the Food Network website. It's from Ina Garten - the Barefoot Contessa. It had a 5-star rating with over 700 positive reviews. I'm so glad that it had a video because honestly reading recipe instructions overwhelm and intimidate me. Even the word "sift" is so scary to me! It is so much easier learning a new skill when you watch it get done rather than just reading about it.
So, here's the video and then the recipe follows. I'm going to include another video after the recipe that shows you how to prepare the pans using the baking spray with wax paper and use the cake leveler to level the cake before frosting.
Tuesday, June 15, 2010
Essential Ingredients for Beginners
If you are married to a guy like my husband, store-bought ready mixes are out of the question. I would stock up on cookie and muffin mixes when they go on sale and bake them for my toddler and I will hear him say, "You know it's better if you make them from scratch." I just roll my eyes.
But if you don't live with a picky housemate, go ahead and stock up on Betty Crockers or Duncan Hines. They are really good. There are lots of recipes that even uses the cake mixes.
You'll be surprised that you probably already have most of the ingredients in baking anything from scratch.
Here's a list of items I make sure I never ran out of and to bring to the store for new baking adventure. I always make my grocery list by aisle...
DAIRY, EGGS & CHEESE AISLE (Stock in your refrigerator):
SPICES AND BAKING AISLE (Stock in your pantry):


COOKING OIL AND SPRAYS (in the pantry, too)

Thanks for reading.
But if you don't live with a picky housemate, go ahead and stock up on Betty Crockers or Duncan Hines. They are really good. There are lots of recipes that even uses the cake mixes.
You'll be surprised that you probably already have most of the ingredients in baking anything from scratch.
Here's a list of items I make sure I never ran out of and to bring to the store for new baking adventure. I always make my grocery list by aisle...
DAIRY, EGGS & CHEESE AISLE (Stock in your refrigerator):
- Milk - we always have milk on our refrigerator. One of our kids is a milkaholic.
- Heavy Cream or Heavy Whipping Cream - just stock the small carton. It's mainly used for frosting or ganache.
- Unsalted Butter - if you are planning to do a lot of baking, get the bulk pack from Costco.
- Eggs - I get the 24-pack ($2) from Costco because I bake something at least once a week. And we also use eggs for breakfast and other meal recipes.
- Cream Cheese - for the cream cheese frosting lover in you. Cream cheese frosting always goes well with Red Velvet Cake. I have the 8 oz tub on hand all the time. Even if you don't end up using it for baking, you can always use it as a bagel or sandwich spread.
- Sour Cream - some bread recipes call for this. Again, just an 8 oz. tub on your refrigerator will do.
- Buttermilk - my chocolate cake recipes uses buttermilk and it's a really good recipe from Ina Garten. So, I always make sure I have that small carton ready all the time.
SPICES AND BAKING AISLE (Stock in your pantry):
- All-purpose Flour - just the regular, everyday flour.
- Cake Flour - this is packed in a carton. Some recipes on the Food Network prefer using this kind of flour over the all-purpose flour. Don't ask me why. I'm a beginner, too. Remember?
- Brown Sugar - I always see recipes ask for light brown sugar or packed brown sugar.
- Powdered (Confectioner's) Sugar - every time I go to the store, I get a 2 lb. bag of powdered sugar. The ones you buy in the 1-lb box and 2-lb bags are already pre-sifted. One recipe of frosting will sometimes call for a whole bag of these. That's why I always get a bag, just in case.
- Granulated Sugar - it's the regular white sugar also called caster sugar.
- Baking Powder
- Baking Soda

- Table Salt
- Unsweetened Cocoa Powder - I use Hershey's all the time. I've tried the "Perfectly Chocolate" Chocolate Cake at the back of the can. The cake is great and very moist but the frosting is too sweet.
- Chocolate Chips/Morsels - get semi-sweet, it's the all-purpose chocolate. The most common brand you see in stores is Nestle Toll House in the yellow bags.
- Unsweetened Chocolate - this is a common baking ingredient chocolate. Kraftfood's Baker's Chocolate is the cheapest and most common brand. I haven't tried any of the premium brands.
- Vanilla Extract - clear vanilla extract is preferred. Personally, I just use the Kirkland brand I got from Costco.

- Gel Food Colors - gel paste food coloring is better than the liquid kind. I've already accumulated a few Wilton brand colors but my very first set I got from Safeway - the Betty Crocker Assorted Classic.
COOKING OIL AND SPRAYS (in the pantry, too)
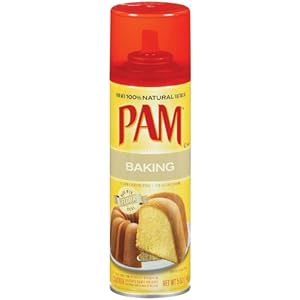
- Nonstick spray with flour - the shortcut to having to butter and flour pans which honestly, I don't know how to do. Spraying the pan is so much simpler. I got the PAM brand.
- Vegetable Oil
- Vegetable Shortening - Crisco is the popular brand. It's better even if you buy the one already pre-measured in 8 oz tubs.
- Parchment Paper
- Wax Paper
- Cupcake Liners
Thanks for reading.
Friday, June 11, 2010
Basic Tools and Equipments
The oven at our first house was almost untouched when we left it and put it up for sale. I probably can count on my fingers the times I've actually used that thing. There is something about how our kitchen in this new house that we moved in that got me to cook and bake. I dunno. Maybe, the walk-in pantry?
So, okay. Obviously, aside from the oven, there are a few basic tools and equipments you will need to get yourself started into being a baker.
Below are some of the basic pieces I started with. I will make another list of the items I added as needed. I got most of my stuff from Wal-Mart. Don't even waste time looking somewhere else to get it cheap. They have the cheapest. Believe me. I've hit myself several times in the head because I bought something from somewhere else, only to find out later that I could've save $2-5 if I bought it at Wal-Mart. Alright! On to my list...


 The last thing I want is for baking to seem overwhelming; I want you to be excited about all that sugar, flour and butter has to offer.
Thanks for reading and please do leave comments if you have a question.
So, okay. Obviously, aside from the oven, there are a few basic tools and equipments you will need to get yourself started into being a baker.
Below are some of the basic pieces I started with. I will make another list of the items I added as needed. I got most of my stuff from Wal-Mart. Don't even waste time looking somewhere else to get it cheap. They have the cheapest. Believe me. I've hit myself several times in the head because I bought something from somewhere else, only to find out later that I could've save $2-5 if I bought it at Wal-Mart. Alright! On to my list...
- HAND MIXER
- I got mine for $20 from Target. Then I found out later on it's only $15 in Wal-mart. It came with a snap-on case storage case, the traditional beaters and a whisk.You need this to mix the cake batter or the frostings.
- BAKING SET
- MIXING BOWL SET
- I got a set from Big Lots for $10. Another friend also gave me a fancy set from Crate & Barrel.

- STRAINER
- used to get lumps out of flour or sugar.
- LIQUID MEASURING CUP
- the standard Pyrex glass cup for measuring milk, cream, oil or water.
- DRY MEASURING CUPS AND SPOONS
- OMG! I don't know why these stainless steel ones are like $20 at Bed Bath & Beyond or Crate & Barrel when they are just $8-12 at Wal-Mart. Why is that? Anyway, you need this for measuring flour, sugar, cocoa powder, vanilla extract, etc.

- RUBBER SPATULAS
- I don't even know where I got mine. My mother-in-law probably left it at our house. Since it was all worn out, I got my own set later on at Wal-Mart ($3), of course. This is good for scraping down your bowl and adding ("folding" in cake lingo) nuts or fruits into cake batter.

- METAL SPATULAS
- I got two 8" angled spatulas and a 13" angled spatula, too. They should cost between $4-$8. This has countless decorating uses.
- CAKE LEVELER
- it's a metal slicer than easily levels and tortes cake layers.
- DECORATING TURNTABLE
- not really a basic need but if you have this when you bake and decorate your cake for the first time, it will eliminate a lot of frustrations and difficulties first timers get. I wish I had this the first time I made my cake.
- CAKE SERVING BOARDS
-you use this to present your cake in. I use the disposable cardboard cake circles you get in packs of 10 or 12 depending on the size. Then I wrap them in foil.
Thanks for reading and please do leave comments if you have a question.
Subscribe to:
Posts (Atom)

